How to install Netbox
NetBox is an open source web application the is design to manage a network infrastructure.
In this tutorial, we will be installing Netbox (netbox2001 (v2.4.5-dev)) using puppet for the installation and a bash script for the basic configuration.
Prerequisites
For this turtorail, we will need:
- A puppet master node (puppet version 4.10)
- The netbox node (Debian 9 Stretch and puppet client vesion 4.8)
- The puppetlabs postgresql module
- The puppetlabs-vcsrepo module
Installation
We will not convert the installation and configuration of puppet master in this tutorial. if you do not have a puppet master server in your environment, you can do all the steps below manually by following the instructions in the reference section. Once done, you can continue with this tutorial from the configuration section.
Download modules
Login to your puppet master node and issue the command below to download the puppetlabs postgresql module
sudo puppet module install puppetlabs-postgresql --version 5.9.0
This will download the postgresql moudle and save it into
/etc/puppetlabs/code/environments/production/modules$
Next we will download the puppetlabs vcsrepo module using the command below
sudo puppet module install puppetlabs-vcsrepo --version 2.3.0
This will download the vcsrepo moudle and save it into
/etc/puppetlabs/code/environments/production/modules$
Create the class
Let us create our netbox_install class that will be used to install Netbox and Posgresql. Under /etc/puppetlabs/code/environments/production/modules/$ create netbox directory
sudo mkdir /etc/puppetlabs/code/environments/production/modules/netbox/$
Then create the manifests director under the netbox directory
sudo mkdir /etc/puppetlabs/code/environments/production/modules/netbox/manifests$
Navigate to the sudo mkdir /etc/puppetlabs/code/environments/production/modules/netbox/manifests$ and create a file called netbox_install.pp
sudo vi netbox_install.pp
Copy and paste the content below into the file (netbox_install.pp)
#This class will install netbox on Debian 9
class netbox::netbox_install {
#Install needed packages
       Package { ensure => "installed"}
       package { "libpq-dev":}
       package { "python3":}
       package { "python3-dev":}
       package { "python3-setuptools":}
       package { "build-essential":}
       package { "libxml2-dev":}
       package { "libxslt1-dev":}
       package { "libffi-dev":}
       package { "graphviz":}
       package { "libssl-dev":}
       package { "zlib1g-dev":}
       package { "python3-pip":}
       package { "git":}
       package { "redis-server":}
       package { "nginx":}
       package { "supervisor":}
#Install postgresql to use as database
# Create a hash from Hiera Data with the Databases
$myPostgresDb = hiera('postgresql::server::db', {})
# With Create Resource Converts a hash into a set of resources
create_resources('postgresql::server::db', $myPostgresDb)
# Create the netbox user
       user { 'netbox':
               ensure  => 'present',
               comment => 'netbox',
               managehome => false,
               password => 'netbox_user_password',
       }
# Create the netbox directory
       file { '/opt/netbox':
               ensure => directory,
               owner => 'netbox',
               group => 'netbox',
               mode => '0766',
      }
# Download netbox from github.com
      vcsrepo { '/opt/netox':
               ensure   => present,
               provider => git,
               source   => 'https://github.com/digitalocean/netbox.git',
               user     => 'netbox',
      }
#
       package { 'napalm':
         ensure   => 'installed',
         provider => 'pip3',
       }
       package { 'django-rq':
         ensure => 'installed',
         provider => 'pip3',
       }
package { 'gunicorn':
         ensure => 'installed',
         provider => 'pip3',
       }
#configure Nginx
       service { 'nginx':
               ensure => running,
       }
       file { '/etc/nginx/sites-enabled/default':
               ensure => absent,
       }
       file { '/etc/nginx/sites-available/netbox':
               ensure => present,
               require => Package['nginx'],
               owner => 'root',
               group => 'root',
               mode => '0644',
               source => 'puppet:///modules/netbox/netbox',
               notify => Service['nginx'],
       }
#Create symlinks
       file { '/etc/nginx/sites-enabled/netbox':
               ensure => 'netbox',
               target => '/etc/nginx/sites-available/netbox',
               require => Package['nginx'],
       }
#Configure gunicorn
       file { '/opt/netbox/gunicorn_config.py':
               ensure => present,
               owner => 'netbox',
               group => 'netbox',
               mode => '0644',
               source => 'puppet:///modules/netbox/gunicorn_config.py',
       }
#Configure supervisord
       service { 'supervisor':
               ensure => running,
       }
       file { '/etc/supervisor/conf.d/netbox.conf':
               ensure => present,
               require => Package['supervisor'],
               owner => 'root',
               group => 'root',
               mode => '0644',
               source => 'puppet:///modules/netbox/netbox.conf',
               notify => Service['supervisor'],
       }
#Create configuration file
       file { '/opt/netbox/netbox/netbox/configuration.py':
               ensure => present,
               owner => 'netbox',
               group => 'netbox',
               mode => '0644',
               content => template('netbox/configuration.erb'),
       }
#create the bash configuration script
       file { '/usr/local/bin/config.sh':
               ensure => present,
               owner => 'root',
               group  => 'root',
               mode => '0755',
               source => 'puppet:///modules/netbox/config.sh',
       }
}
Add the node to site.pp
On your puppet master node open the site.pp file and add the netbox node like below
node netbox2001 {
       include netbox::netbox_install
       include postgresql::server
}
The include postgresql::server will install postgresql on the node with no password.How to setup the password is convert in the hiera section below.
Setup hiera
Under your hieradata directory, create a directory called hosts
/etc/puppetlabs/code/environments/production/hieradata/hosts
Then create a yaml file with the name of the netbox node
vi netbox2001.yaml
Copy and paste the content below into the file
---
postgresql::server::postgres_password: postgre_password
postgresql::server::db:
 netbox:
   user: netbox
   password: netbox_user_passsword
postgresql::server::role:
 netbox:
   password_hash: '*EAA615A0970C05B84915C0772FD1C23831586837'
postgresql::server::database_grant:
 netbox:
   privilege: ALL
   db: netbox
   role: netbox
By default after installing Posgretsql there is no password so the first line of the code above will setup a password.In the same code we will create a database called netbox and a user for that database netbox who has full privilege on the database.
Others needed files
On your puppet master node navigate to Navigate to /etc/puppetlabs/code/environments/production/modules/netbox/ and create the repertories files and templates
cd /etc/puppetlabs/code/environments/production/modules/netbox/
sudo mkdir files
sudo mkdir templates
- what's goes in the files repertory
In the files repertory we will have 4 files ( netbox, netbox.conf,gunicorn_config.py and config.sh) Copy and paste the content of each of the 4 files below and place them in the files repertory
- netbox
server {
   listen 80;
   server_name netbox2001.dfw.ppnet;
   client_max_body_size 25m;
   location /static/ {
       alias /opt/netbox/netbox/static/;
   }
   location / {
       proxy_pass http://127.0.0.1:8001;
       proxy_set_header X-Forwarded-Host $server_name;
       proxy_set_header X-Real-IP $remote_addr;
       proxy_set_header X-Forwarded-Proto $scheme;
       add_header P3P 'CP="ALL DSP COR PSAa PSDa OUR NOR ONL UNI COM NAV"';
   }
}
Change the server_name to match your environment
- netbox.conf
[program:netbox]
command = gunicorn -c /opt/netbox/gunicorn_config.py netbox.wsgi
directory = /opt/netbox/netbox/
user = www-data
[program:netbox-rqworker]
command = python3 /opt/netbox/netbox/manage.py rqworker
directory = /opt/netbox/netbox/
user = www-data
- gunicorn_config.py
command = '/usr/local/bin/gunicorn'
pythonpath = '/opt/netbox/netbox'
bind = '127.0.0.1:8001'
workers = 3
user = 'www-data'
- config.sh
#!/bin/bash
#make the media directory and subdirectories writable by netbox user
echo "changing directory permission"
sleep 3
chown -R netbox:netbox /opt/netbox/netbox/media/
echo "Install python packages"
sleep 3
cd /opt/netbox/
sudo pip3 install -r requirements.txt
echo "database Migrations"
sleep 3
cd /opt/netbox/netbox/
sudo python3 manage.py migrate
echo "Create a Super User"
sleep 3
sudo python3 manage.py createsuperuser
echo "collect Static files"
sleep 3
sudo python3 manage.py collectstatic --no-input
- What's goes into the templates repertory
The configuration.erb file will be placed in this repertory. Download the file below and place it in the template repertory.
Run puppet
Now that we have all the files on the puppet master, login into your netbox node and run the command
sudo puppet agent -t
Generate Secret_key
Go to /opt/netbox/netbox and run ./generate_secret_key.py
cd /opt/netbox/netbox
./generate_secret_key.py
This will generate a key like this :VIkw8=*%D+W@LUlXn&NPeJ2yxO(gqBHduAavjY94G0f5b!mR$S. Copy and save this key somewhere. We will need it later.
Modify configuration.erb
Log back to the puppet master node and navigate where you saved the configuration.erb file and open it.
cd /etc/puppetlabs/code/environments/production/modules/netbox/templates$
vi configuration.erb
Once the file open, change lines 11,16,17.26
 ALLOWED_HOSTS = ['<%= @fqdn %>', '<%= @ipaddress_ens32 %>']   #line 11 Change ens32 to math the name of our network interface like eth0
'USER': 'your_username',               # PostgreSQL username   #line 16 Database user name
'PASSWORD': 'your_password',           # PostgreSQL password   #line 17 Dataabase user password
 SECRET_KEY =                                                 #line 26 Place the secret_key you generate here
Note: on line 11 if you do not have a fqdn, just remove it and use the ip address portion or just hostname Save file.
- On netbox node
Run puppet again
sudo puppet agent -t
If you have no errors, go to the next step to verify that we have Postgresql installed and we can login with the pPstgreSql default user and netbox user with the password created. Verify too that we the netbox database was create.
Verification
- login with the defaut user postgres
psql -U postgres -W -h localhost
When prompt, enter the password
ppaul@netbox2001:~$ psql -U postgres -W -h localhost
Password for user postgres:
psql (9.6.10)
SSL connection (protocol: TLSv1.2, cipher: ECDHE-RSA-AES256-GCM-SHA384, bits: 256, compression: off)
Type "help" for help.
postgres=#
Type \q to exit and test login with the netbox user
- Login with the netbox user
ppaul@netbox2001:~$ psql -U netbox -W -h localhost
Password for user netbox:
psql (9.6.10)
SSL connection (protocol: TLSv1.2, cipher: ECDHE-RSA-AES256-GCM-SHA384, bits: 256, compression: off)
Type "help" for help.
netbox=>
- verify that the netbox database exist
after loging in as the netbox user, at the prompt, type "\l"
netbox=> \l
                                 List of databases
  Name    |  Owner   | Encoding |   Collate   |    Ctype    |   Access privileges
-----------+----------+----------+-------------+-------------+-----------------------
netbox    | postgres | UTF8     | en_US.UTF-8 | en_US.UTF-8 | =T/postgres          +
          |          |          |             |             | postgres=CTc/postgres+
          |          |          |             |             | netbox=CTc/postgres
postgres  | postgres | UTF8     | en_US.UTF-8 | en_US.UTF-8 |
template0 | postgres | UTF8     | en_US.UTF-8 | en_US.UTF-8 | =c/postgres          +
          |          |          |             |             | postgres=CTc/postgres
template1 | postgres | UTF8     | en_US.UTF-8 | en_US.UTF-8 | =c/postgres          +
          |          |          |             |             | postgres=CTc/postgres
(4 rows)
netbox=>
Configuration
On the netbox node, navigate to /usr/local/bin and run the config.sh script
cd /usr/local/bin
sudo ./config.sh
You will be asked to create an administrator username and password. When asked, enter the administrator user name. In my case I set that to "admin" and enter your chosen password.
Testing
Open a browser and type in your netbox IP address or fqdn or hostname. In my case i will use the ip address.
Click on log in and enter the administrator username and password
Administration
Adding users
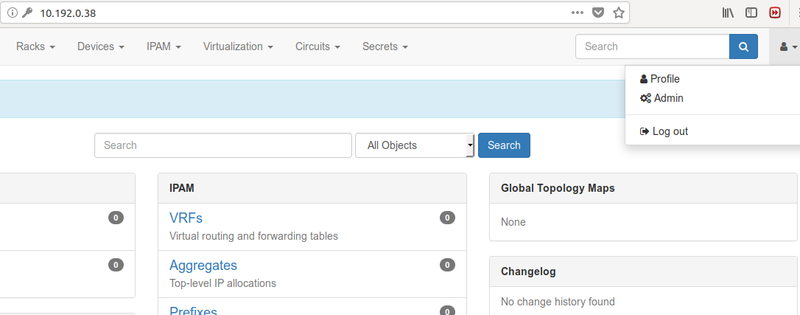
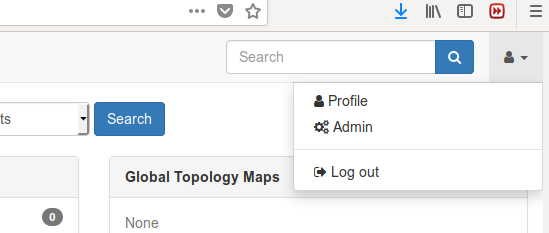
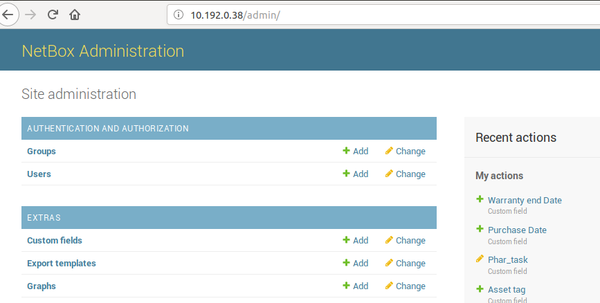
For now, we will use the build in option to manually add users. I will make another tutorial on how to use LDAP. Once login as the admin user, on the right top corner of your window, click on "admin" to access the admin page.
Once on the admin page, click on "Add" On the next page enter the username and password and click on save.
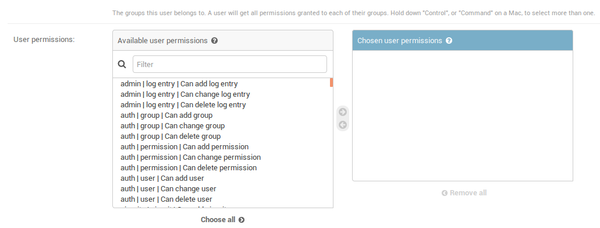
After adding the user(s) go to the user list page and click on the user name. This will take you to the change user page. On this page, you can add the user first name, last name and email. you can also give the use the permission you want. ( See image below)
Adding Custom fields
Conclusion
In this tutorial, we installed Netbox using puppet. We will discuss in the upcoming section how to use Ldap for authentication.


